Overview
This guide will walk you through setting up network game sharing between your PC and Xbox 360 using Aurora dashboard and the Connect Plugin. This allows you to play games directly from your PC without copying them to your console.
1
Prepare Your PC
- Plug the external drive into your PC
- Open the ConnectxUser.txt file
- Replace the drive letter (e.g., E:\Games) with your actual drive path
- Press Enter to apply the changes
2
Enable SMB Support on Windows
- Open Control Panel > Programs > Turn Windows features on or off
- Make sure ✅ SMB 1.0/CIFS File Sharing Support is checked
- Click OK, and restart your PC if prompted
3
Set Up Connect Plugin on Xbox 360
- Use Xbox 360 Neighborhood or FTP to access your console's storage
- Navigate to: HDD1:\Aurora\Plugins\
- Place the provided connect.xex file into this folder (you should see other .xex files here too)
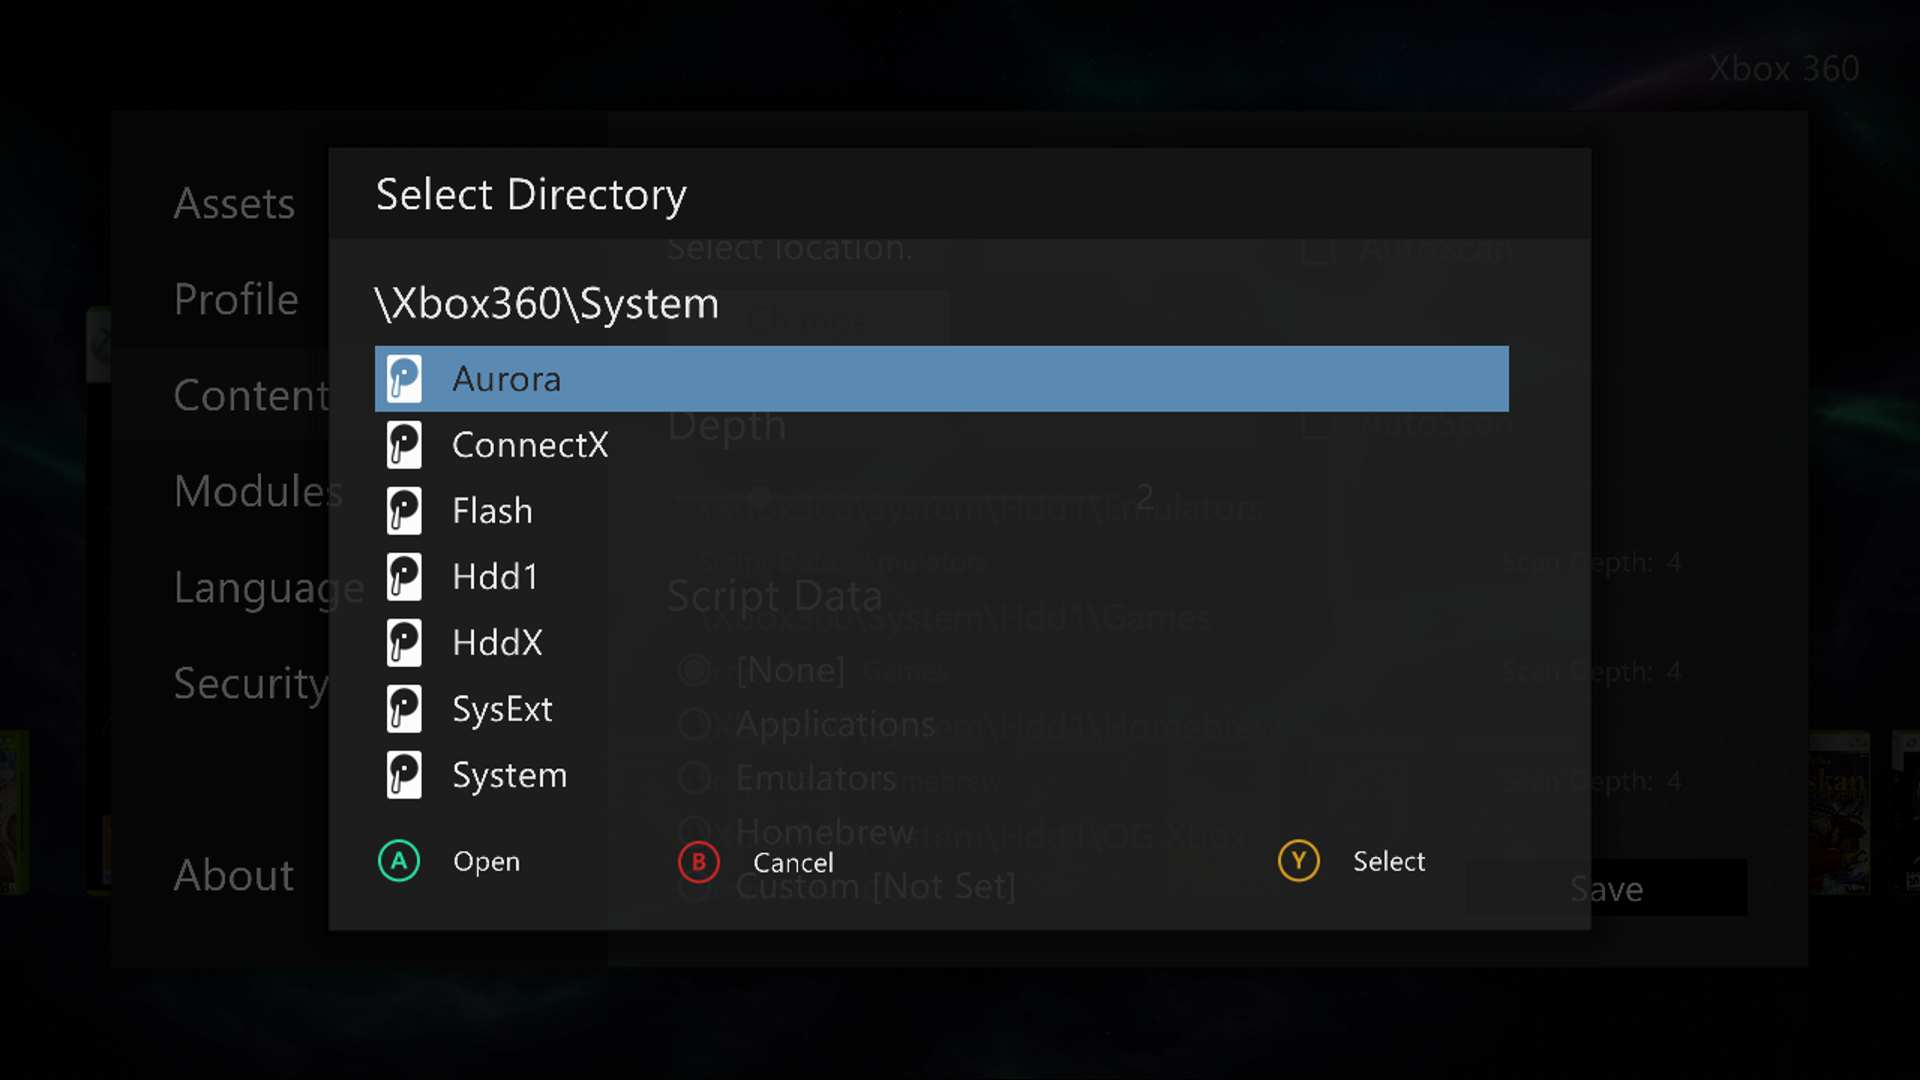
Directory selection screen in Aurora
4
Configure Connect Plugin in Aurora
- Reboot your console
- On the Xbox, open Aurora
- Press Start > go to Modules > select Connect
- Enter the following info:
- Username: xbox
- Password: xbox
- Share Computer Name: (your actual PC name, case-sensitive)
- Share Name: Games
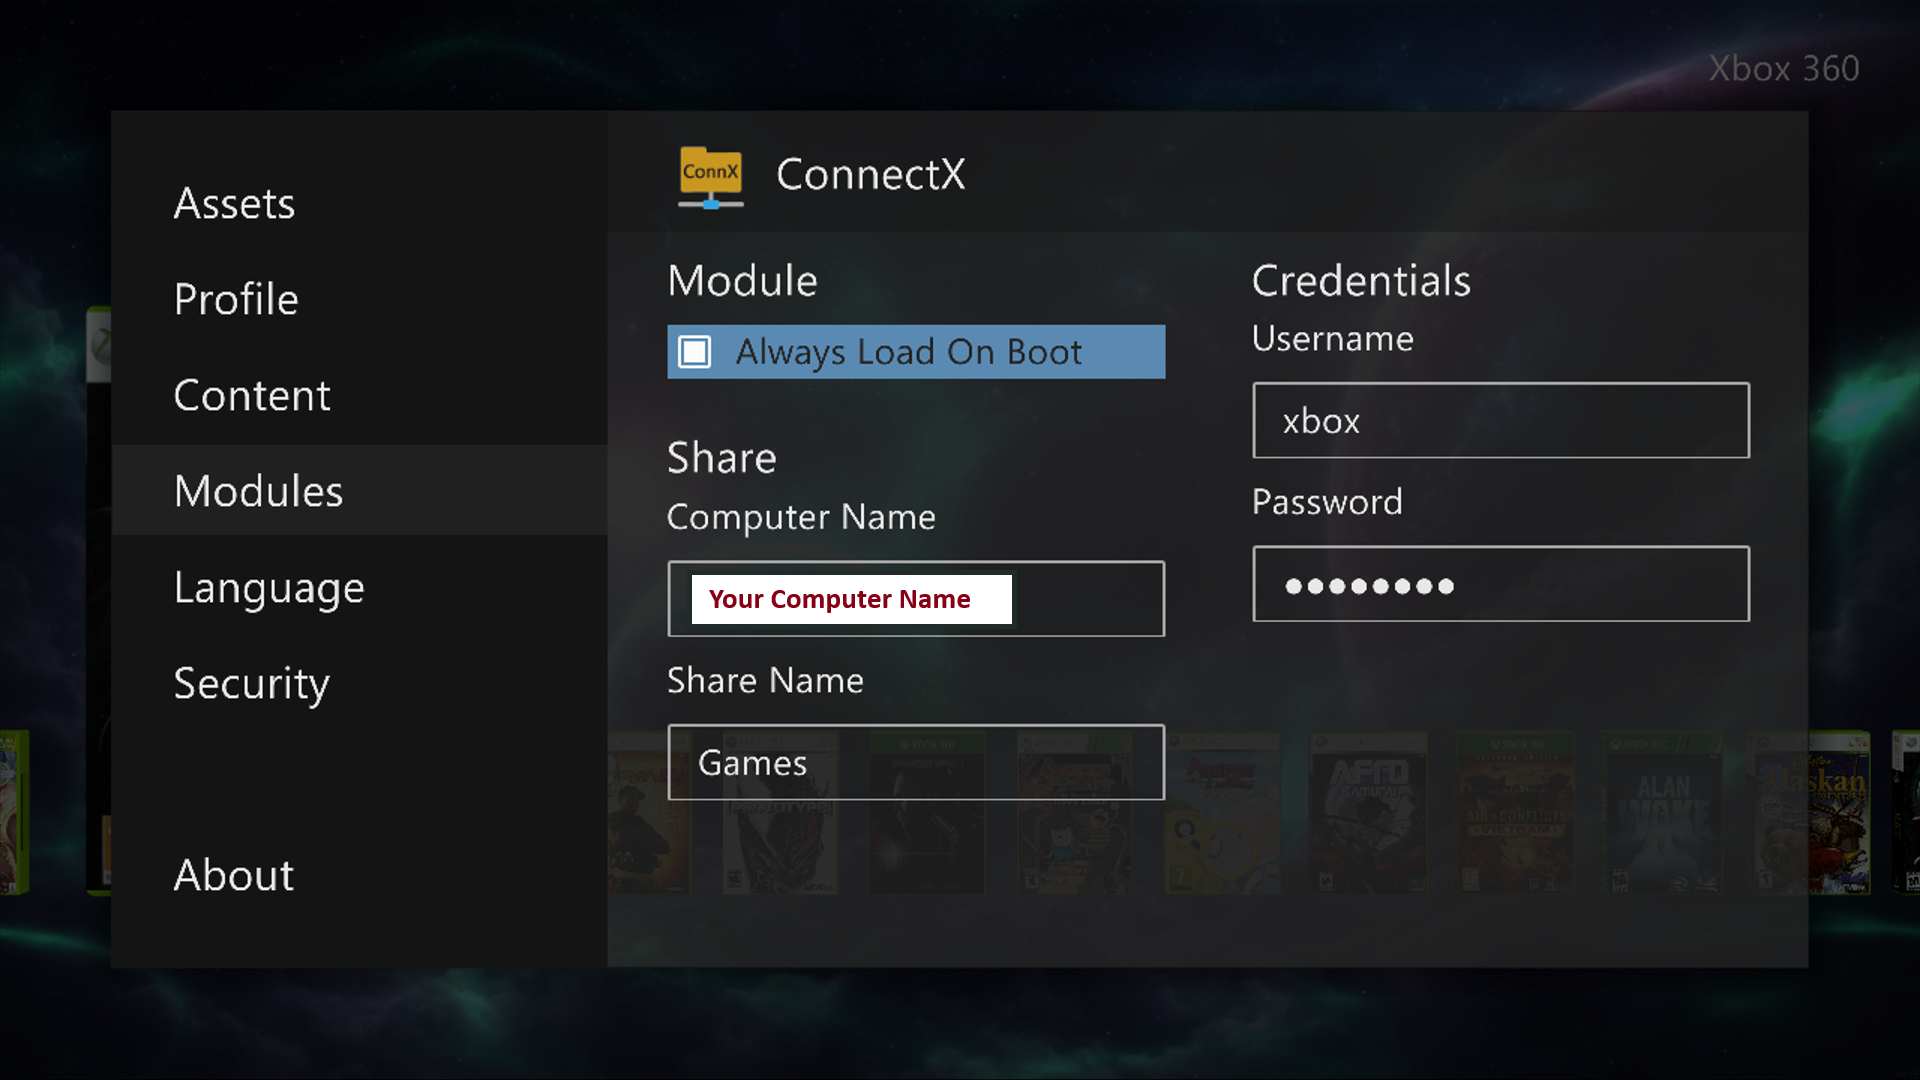
ConnectX configuration screen in Aurora
5
Add Game Path
- Reboot the console again
- Go to Start > Content > Add Path
- Choose Connect, then press Y to confirm
- Select Save, then choose Scan Now
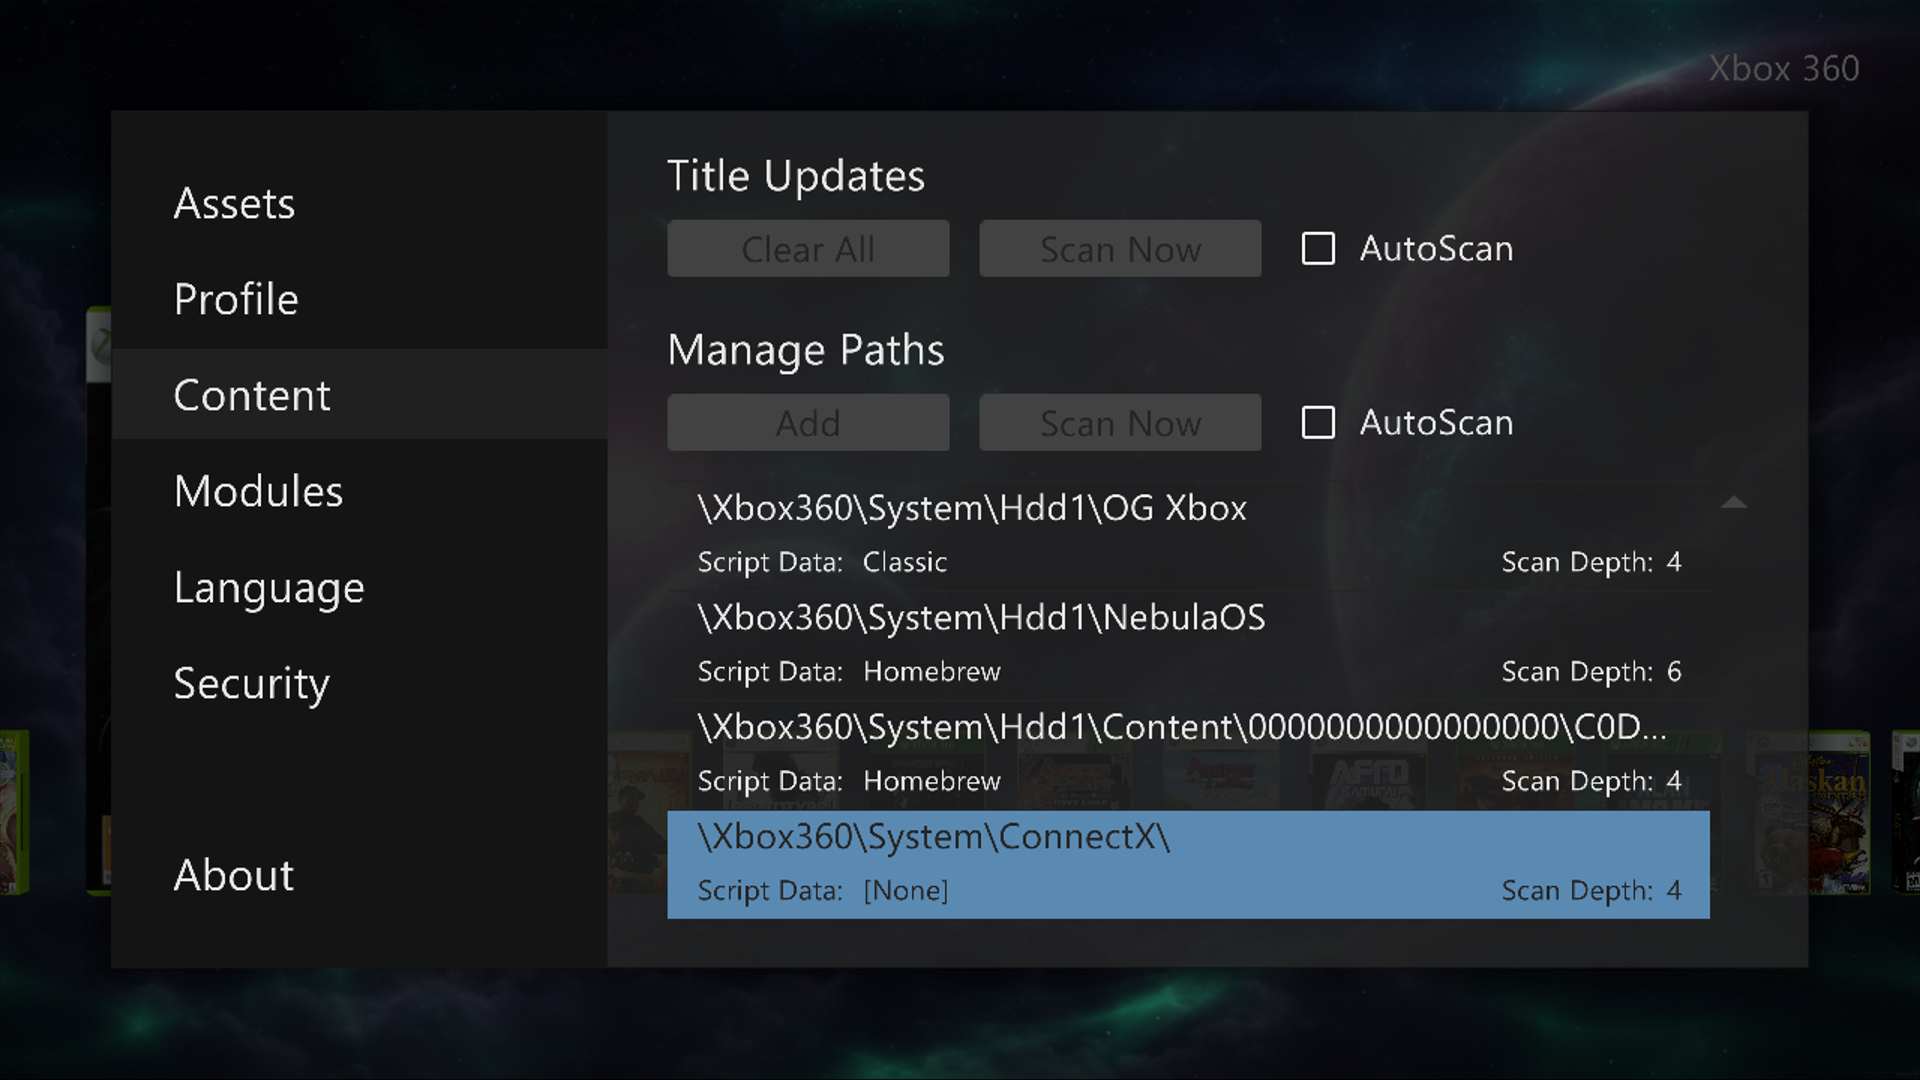
Manage Paths screen in Aurora
You're All Set!
Your games should now load directly from your PC. Enjoy playing without having to transfer files to your console!
Troubleshooting Tips
- 1If games don't appear, double-check your computer name and share name for exact spelling and case sensitivity.
- 2Make sure Windows Firewall isn't blocking file sharing connections.
- 3Verify that your PC and Xbox 360 are on the same network.
- 4Try rebooting both your PC and Xbox 360 if connection issues persist.